Hardware Asset Listing
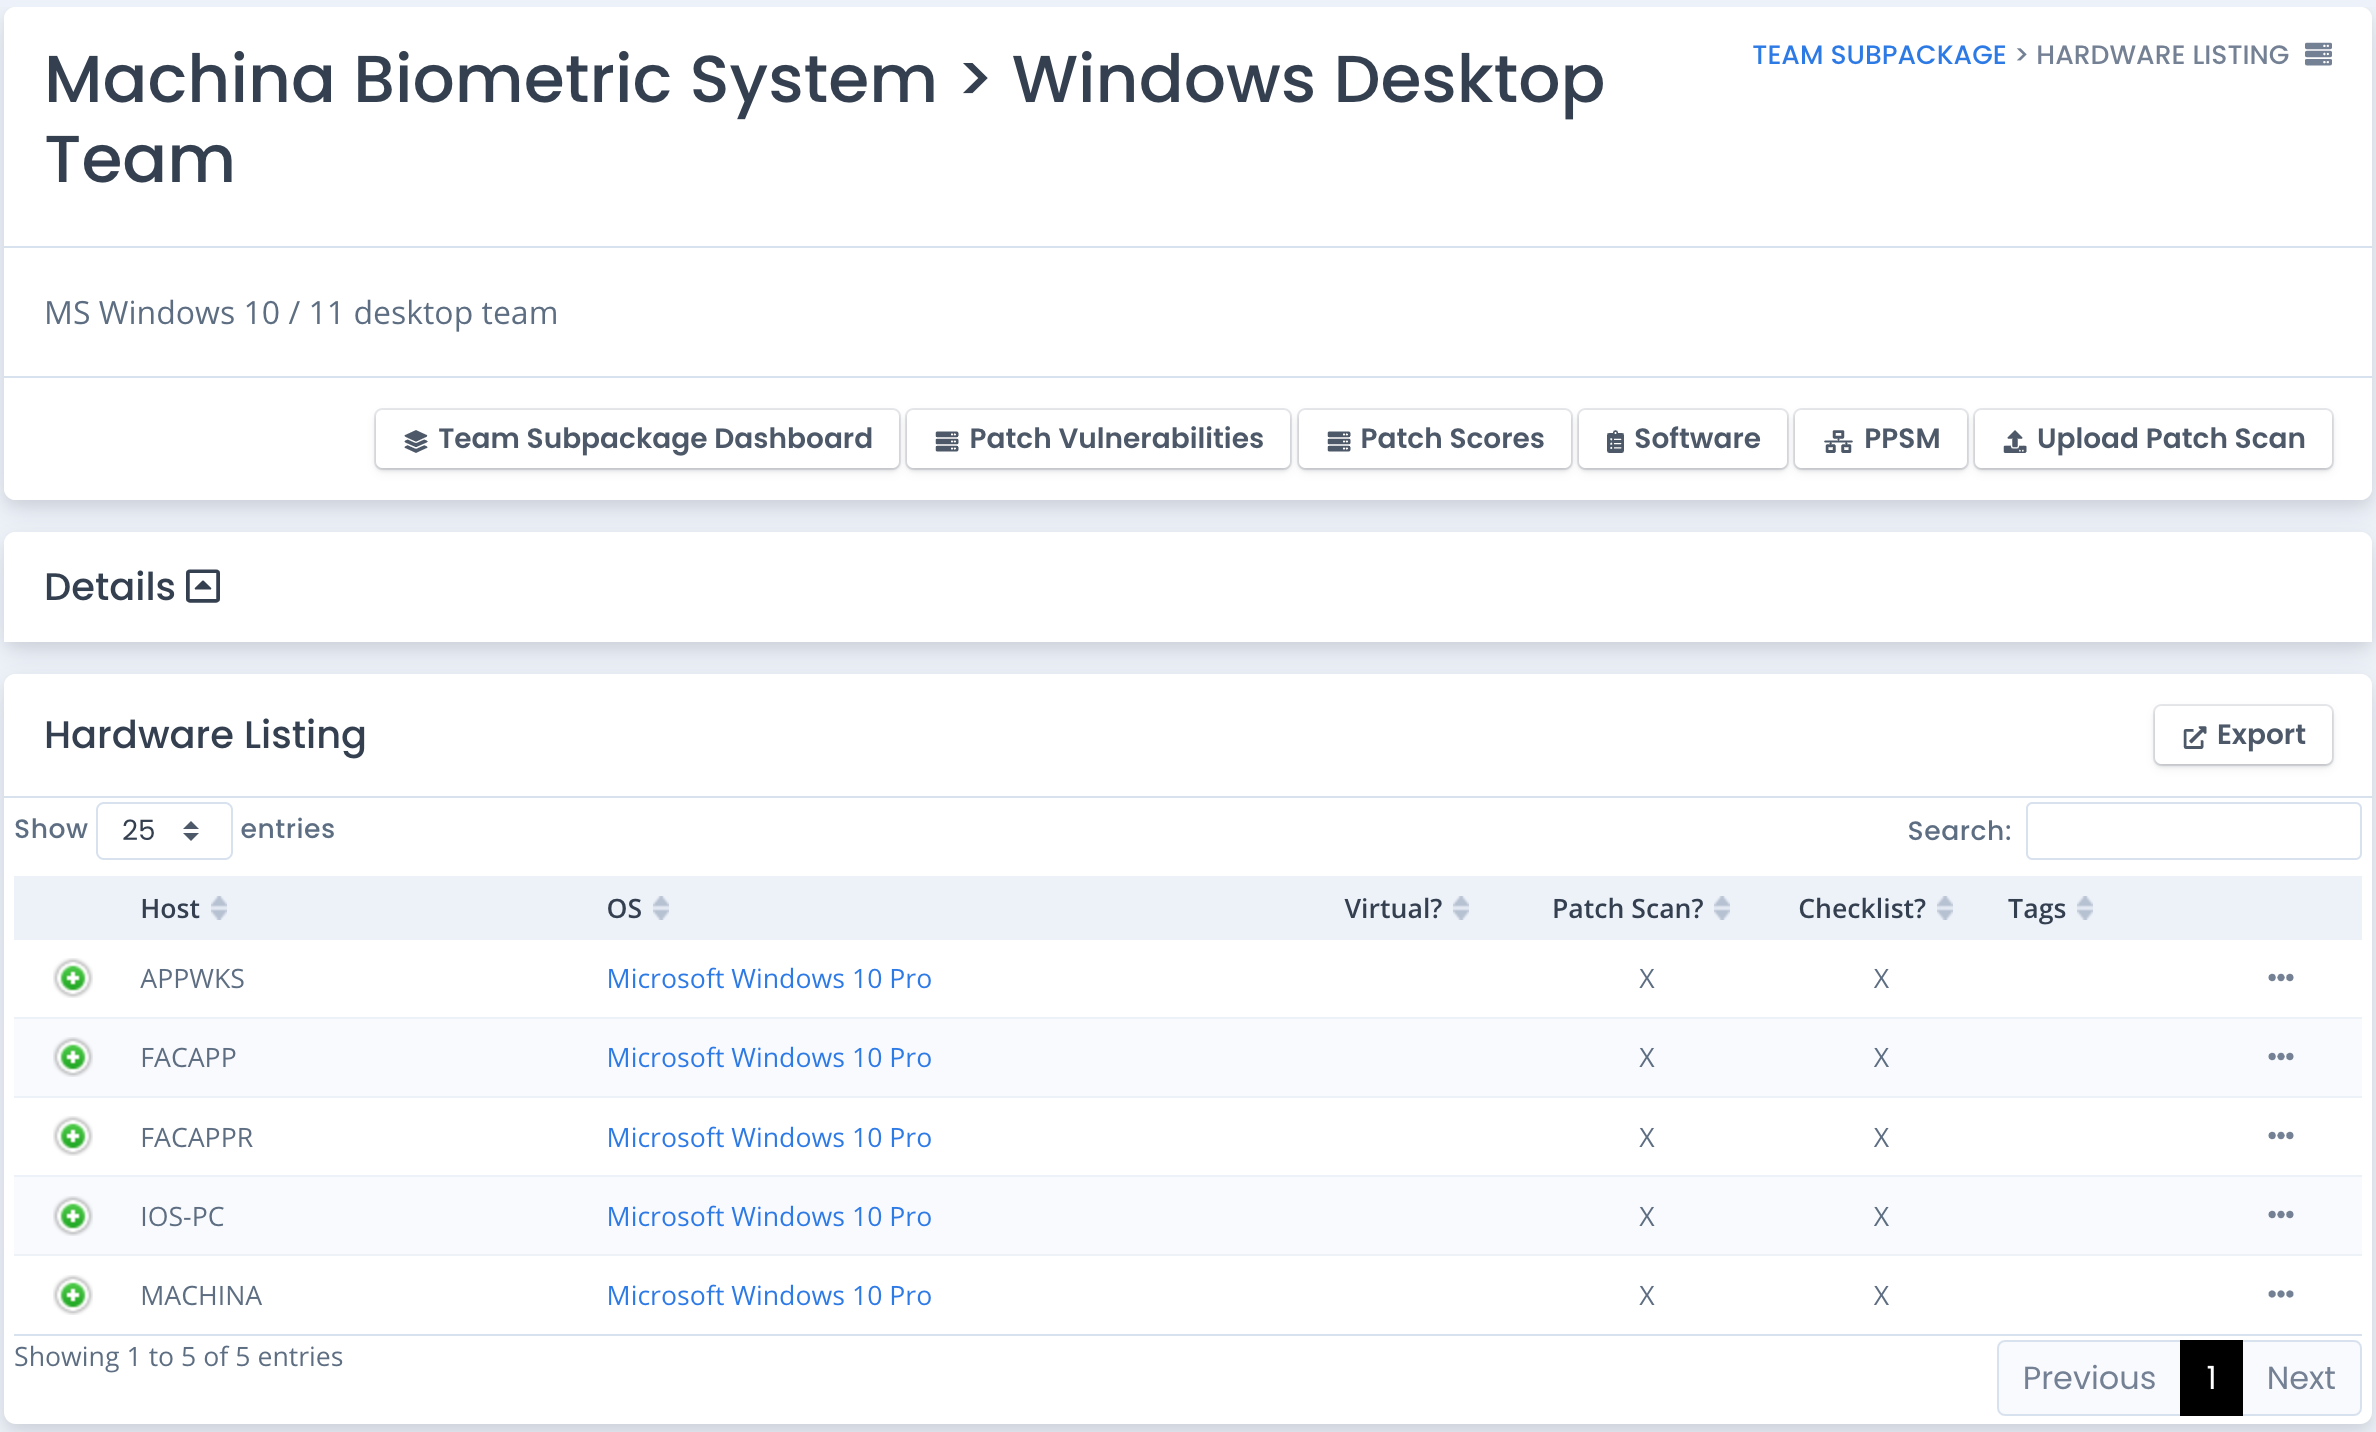
The Hardware page in the Team Subpackage shows all devices that are listed in the team subpackage only. The System Owner of the larger system package controls what devices are added and removed from the team subpackage.
Automatic Hardware Asset Tracking
The Patch Scan uploads allow OpenRMF® Professional to track all hardware assets in the system package by listing all devices scanned. For each device scanned, if that device is not already in the list of hardware it is added. And it is shown to have a corresponding scan done for it. If it is already in the list, its information is updated (i.e. operating system) and it is checked to ensure it shows there is a corresponding scan.
Along with the Patch Scans, uploading Checklists, Audit Compliance scan results and SCAP Scan results that have a hostname also allow the hardware listing to be updated. For each device listed in the checklist or compliance scan, if that device is not already in the list of hardware it is added. And it is shown to have a corresponding checklist for it. If it is already in the list, its information is checked to ensure it shows there is a corresponding checklist.
The IP Address(es) and MAC Address(es) are pulled from the patch scan files, hardware file upload, as well as checklist uploads and edits that match on the hostname. All automated and manual hardware data edits results in a history record being created of the current data before the edit.
Adding Hardware Assets Manually
You also can click the Add button if you have the correct permissions to manually add a hardware device to the listing. Specify the device or host name, operating system, firmware, purpose, and other descriptive information and click Save to add to the hardware assets of your system package.
Uploading Hardware Items
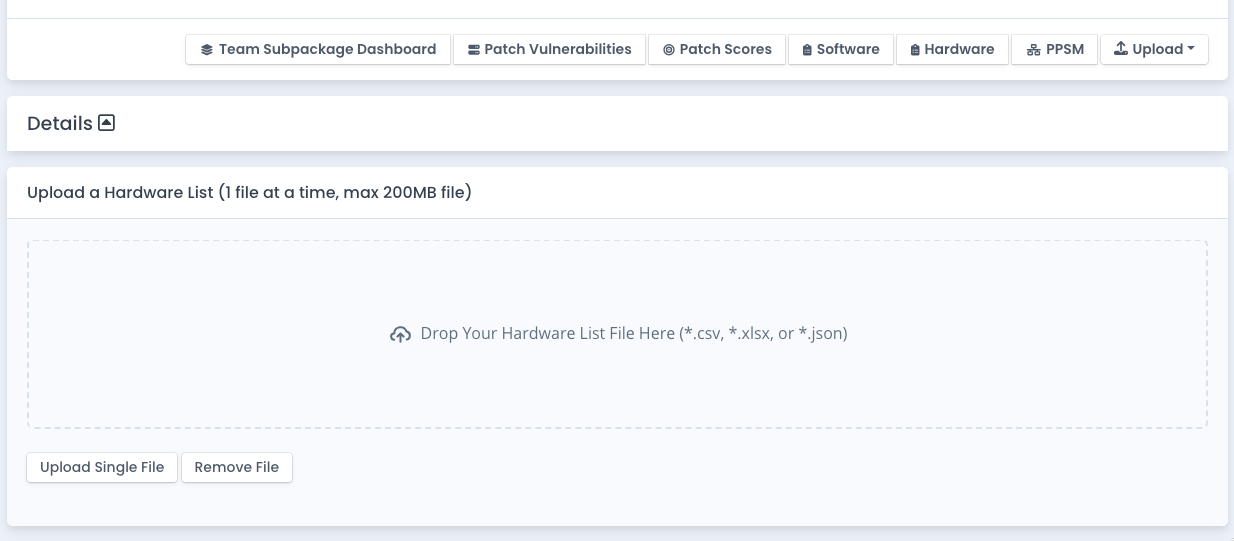
You also can upload a list of hardware items with the proper columns / fields to add or bulk edit (based on hostname) hardware assets for your system package. If you are a System Owner for the package, you can click the Upload –> Hardware List button and select a proper CSV, XLSX, or JSON file. There is sample data linked and listed below. This allows quick loading of hardware assets and descriptive information to use at your system package level.
Download a Sample XLSX as a starting point for uploading a spreadsheet or CSV file. You can also export the general PPSM listing from this page, edit the data, and upload that same file as well for bulk adding or updating the hardware information.
The JSON for the file upload or a JSON post with data in the body for the external API is shown below.
[
    {
        "device": "DEGTHAT2",
        "operatingSystem": "Windows 10",
        "virtualServer": false,
        "firmware": "",
        "manufacturer": "Lenovo",
        "modelNumber": "WKS22234",
        "serialNumber": "2342343-PV1",
        "assetName": "",
        "purpose": "",
        "description": "",
        "ipAddress": "10.10.25.17",
        "macAddress": "00:0C:29:88:C9:7D",
        "tags": [
            "desktop",
            "windows team"
        ]
    },{
        "device": "DEGTHAT3",
        "operatingSystem": "Windows 10",
        "virtualServer": false,
        "firmware": "",
        "manufacturer": "Lenovo",
        "modelNumber": "WKS22234",
        "serialNumber": "2342343-PR2",
        "assetName": "",
        "purpose": "",
        "description": "",
        "ipAddress": "10.10.25.100,10.10.2.55",
        "macAddress": "00:0C:33:88:C9:7D",
        "tags": [
            "desktop",
            "windows team"
        ]
    },{
        "device": "DEGTHATWIN2K16SVR01",
        "operatingSystem": "Microsoft Windows 2016 Server",
        "virtualServer": true,
        "firmware": "",
        "manufacturer": "DELL",
        "modelNumber": "LKUH65GD",
        "serialNumber": "2342343-PV3",
        "assetName": "",
        "purpose": "Web Server",
        "description": "This is the main IIS web server for application hosting internally.",
        "ipAddress": "10.10.25.129",
        "macAddress": "00:0C:29:44:C9:7D",
        "tags": []
    }
]
Editing Hardware Asset
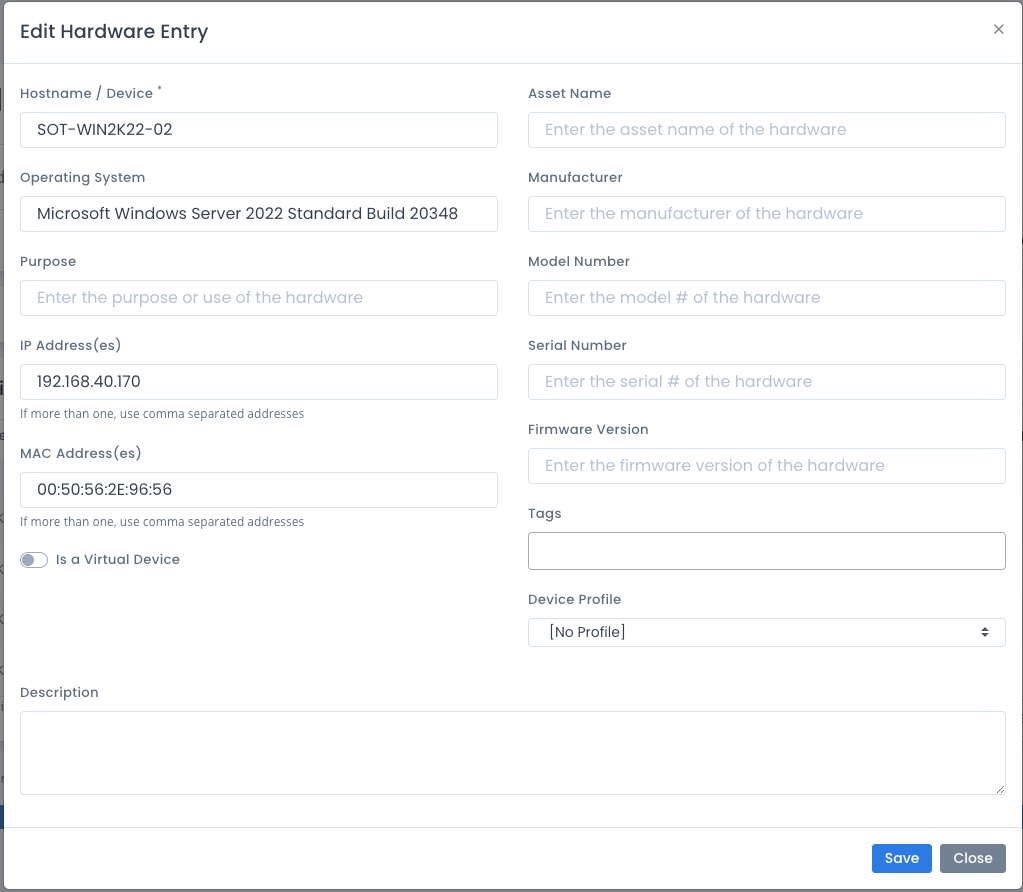
You can edit any of the hardware specifics by clicking the ... menu icon and choosing the Edit menu. Edit the information in the listing as desired and click the Save button. The new information is displayed and a copy of the older record is saved for historical purposes. From this page you can add a serial number, firmware information as well as tags to quickly find and filter your device listing.
There are 2 records you cannot edit manually. The Patch Scan and the Checklist fields of this data are automatically filled in based on Patch Scan, SCAP Scan and Checklist uploads.
Tracking Hardware Asset Edits
For any item that has history records, the … menu shows an option to view the hardware specific edits. Choose the Show Edit History to view a page showing all edits of the hardware item in descending date order.
Manually Deleting Hardware Assets
You can choose the ... menu beside each hardware asset to remove it if you have proper permissions.
Note: This removes ALL traces of that hardware device including patch scans, checklist/compliance scans. Any linked POAM items are marked as Completed. You can optionally add a comment for related POAM items for the deletion as well. It deletes it from the Team Subpackage as well as the main System Package.
If you remove a hardware device and then upload a scan or checklist using it, that the record will reappear in the listing.