Controls Explained
The controls in frameworks are used to specify required processes, procedures, and checks to ensure a cyber compliance framework is met. A lot of the compliance shown in OpenRMF® Professional is rolled up to the control level. And tailoring (adding in / removing individual controls) as well as overlays (adding groups of controls to use) depend on these as well.
Default Controls
There are a lot of the controls included in OpenRMF® Professional by default from the NIST 800-53 list of controls for revision 4 and revision 5. They include several of the mainstream families such as AC-1, AC-2, AU-1, PM-1, SR-1 and others.
Note that default controls within OpenRMF® Professional cannot be edited or deleted.
The controls are used with the default frameworks and framework levels. They also can be used in other frameworks and framework/level combinations that you add to include those controls. You can use and reuse default controls for those frameworks and/or add your own custom controls you add as well. These can be from defined frameworks (HIPAA, HITRUST, IEC 623443, etc.) or can be custom controls for you and your organization.
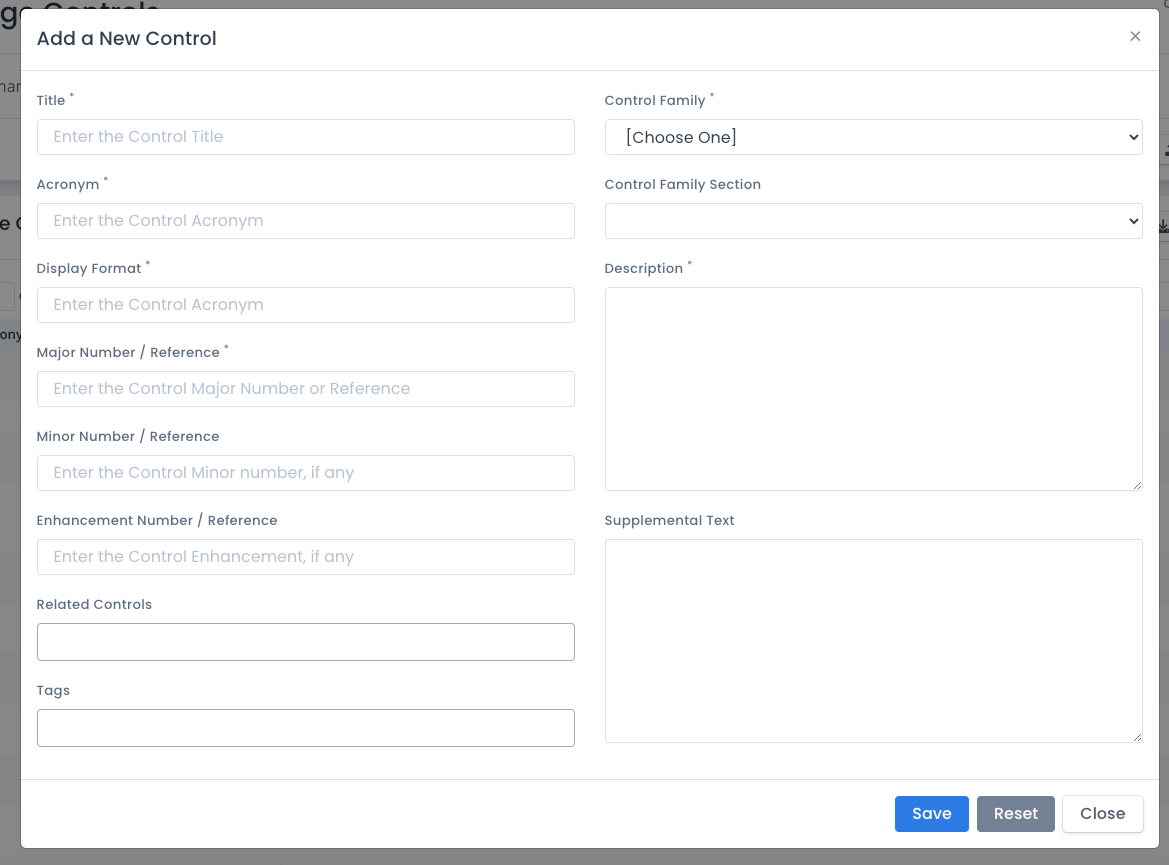
Adding a Control
To add a control, click the Create Control button on the Controls listing page. Enter the control title, acronym, display format (how does it look when people see it and read/use it, e.g. AC-4(1)), major control number as well as the family and description which are all required. You can also specify the minor and enhancement numbers (e.g. AC-4(1) the minor would be “1”), control family section if applicable, and any related controls (using their Display Format).
Finally you can also add 1 or more tags and a description to ensure people understand the control use. Then click the Save button.
Once added, that control can be used in frameworks across the application for any framework where you can add or edit (non-default). It also can be used in tailoring, overlays, and listing controls for reporting purposes.
You also can add controls by uploading an XLSX file in the proper format. You can do this via the Upload menu in the Frameworks area. Make sure you choose the proper file to upload. You can download a Sample Control XLSX as a starting point for uploading a spreadsheet or CSV file. You also can use data for this shown in our public GitHub repo linked off our Soteria Software website as well.
The JSON structure for the control is listed below:
[
    {
        "controlFamilyAcronym": "AC",
        "controlFamilySectionAcronym": "",
        "controlTitle": "Authorized Access Control",
        "controlAcronym": "AC.L1",
        "controlDescription": "Limit information system access to authorized users, processes acting on behalf of authorized users, or devices (including other information systems).",
        "controlDisplay": "AC.L1-3.1.1",
        "controlMajor": "3",
        "controlMinor": "1",
        "controlEnhancement": "1",
        "controlSupplementalText": "",
        "relatedControls": [],
        "tags": []
    },
    {
        "controlFamilyAcronym": "AC",
        "controlFamilySectionAcronym": "",
        "controlTitle": "Transaction & Function Control",
        "controlAcronym": "AC.L1",
        "controlDescription": "Limit information system access to the types of transactions and functions that authorized users are permitted to execute.",
        "controlDisplay": "AC.L1-3.1.2",
        "controlMajor": "3",
        "controlMinor": "1",
        "controlEnhancement": "2",
        "controlSupplementalText": "",
        "relatedControls": [],
        "tags": []
    },
    {
        "controlFamilyAcronym": "AC",
        "controlFamilySectionAcronym": "",
        "controlTitle": "External Connections",
        "controlAcronym": "AC.L1",
        "controlDescription": "Verify and control/limit connections to and use of external information systems.",
        "controlDisplay": "AC.L1-3.1.20",
        "controlMajor": "3",
        "controlMinor": "1",
        "controlEnhancement": "20",
        "controlSupplementalText": "",
        "relatedControls": [],
        "tags": []
    },
    {
        "controlFamilyAcronym": "AC",
        "controlFamilySectionAcronym": "",
        "controlTitle": "Control Public Information",
        "controlAcronym": "AC.L1",
        "controlDescription": "Control information posted or processed on publicly accessible information systems.",
        "controlDisplay": "AC.L1-3.1.22",
        "controlMajor": "3",
        "controlMinor": "1",
        "controlEnhancement": "22",
        "controlSupplementalText": "",
        "relatedControls": [],
        "tags": []
    }
]
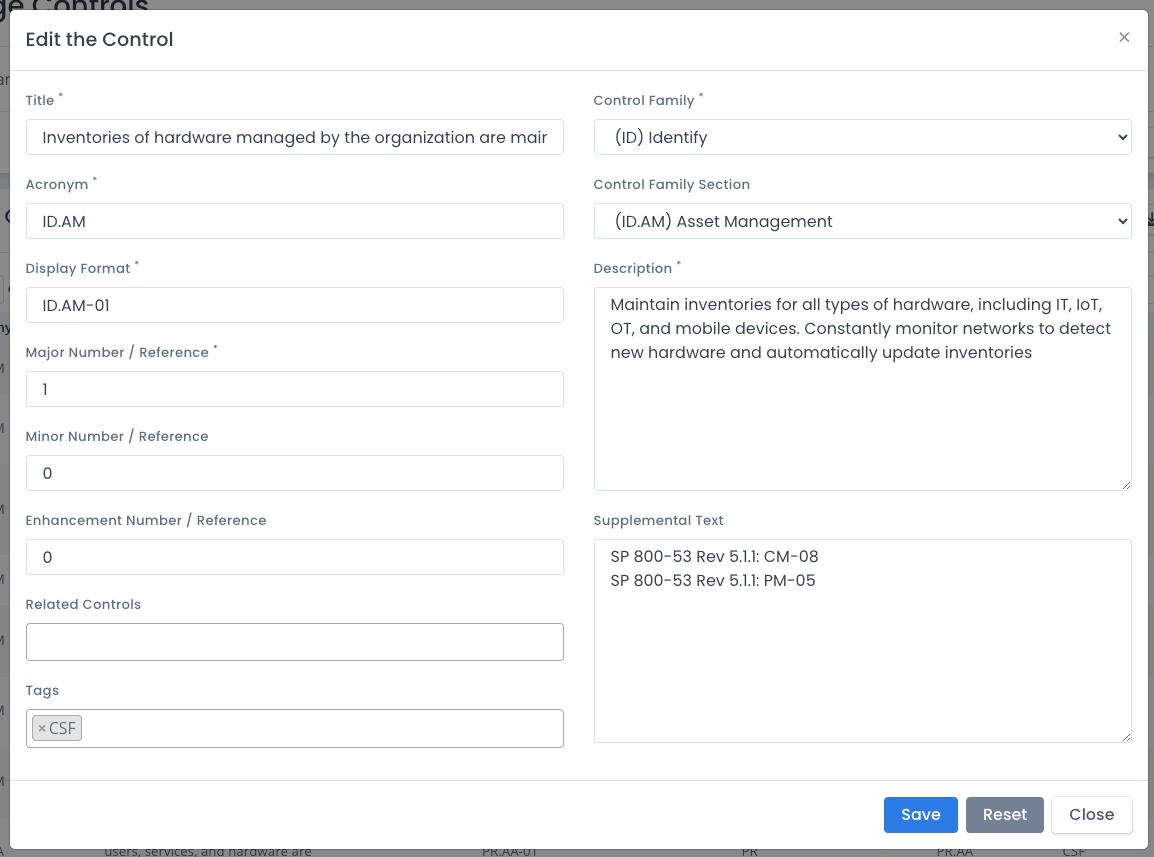
Editing a Control
To edit a control, click the ... menu in the listing of non-default controls and select Edit from the menu. Enter your updates on the control title, acronym, control family, tags, description and other fields. Then click the Save button. When you save the data, all corresponding information such as the title, acronym, version, etc. is updated throughout the solution wherever it is currently being used.
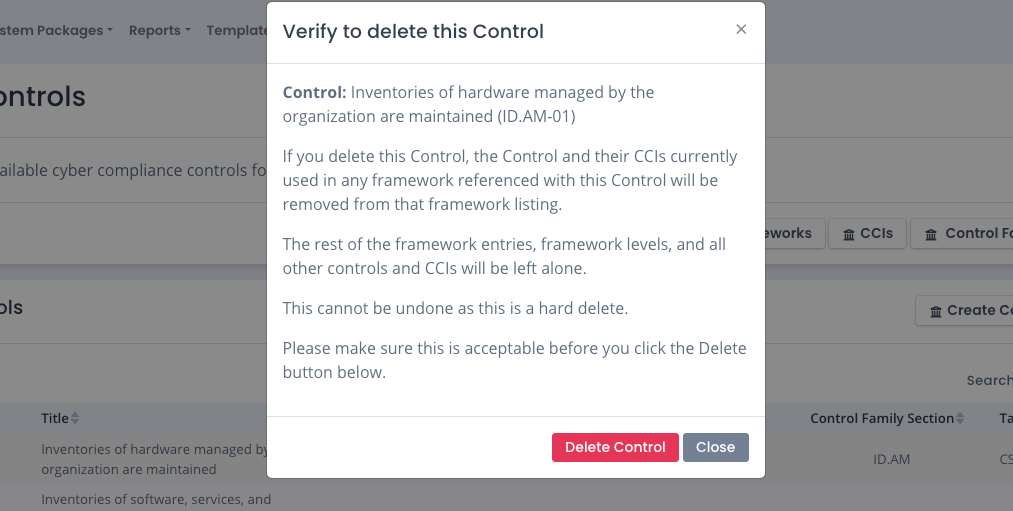
Deleting a Control
To delete a control, click the ... menu in the listing of non-default controls and select Delete from the menu. A warning page shows that when the control is deleted any control/CCI combination within the application on any framework and/or framework level is also removed. You must click the Delete Control button to actual delete the data. All other controls and CCIs as well as the referenced CCIs with this control stay in tact.
This is a hard delete and cannot be undone. You can always re-create or reupload the files that generated the non-default control though.