Viewing Checklist Vulnerabilities
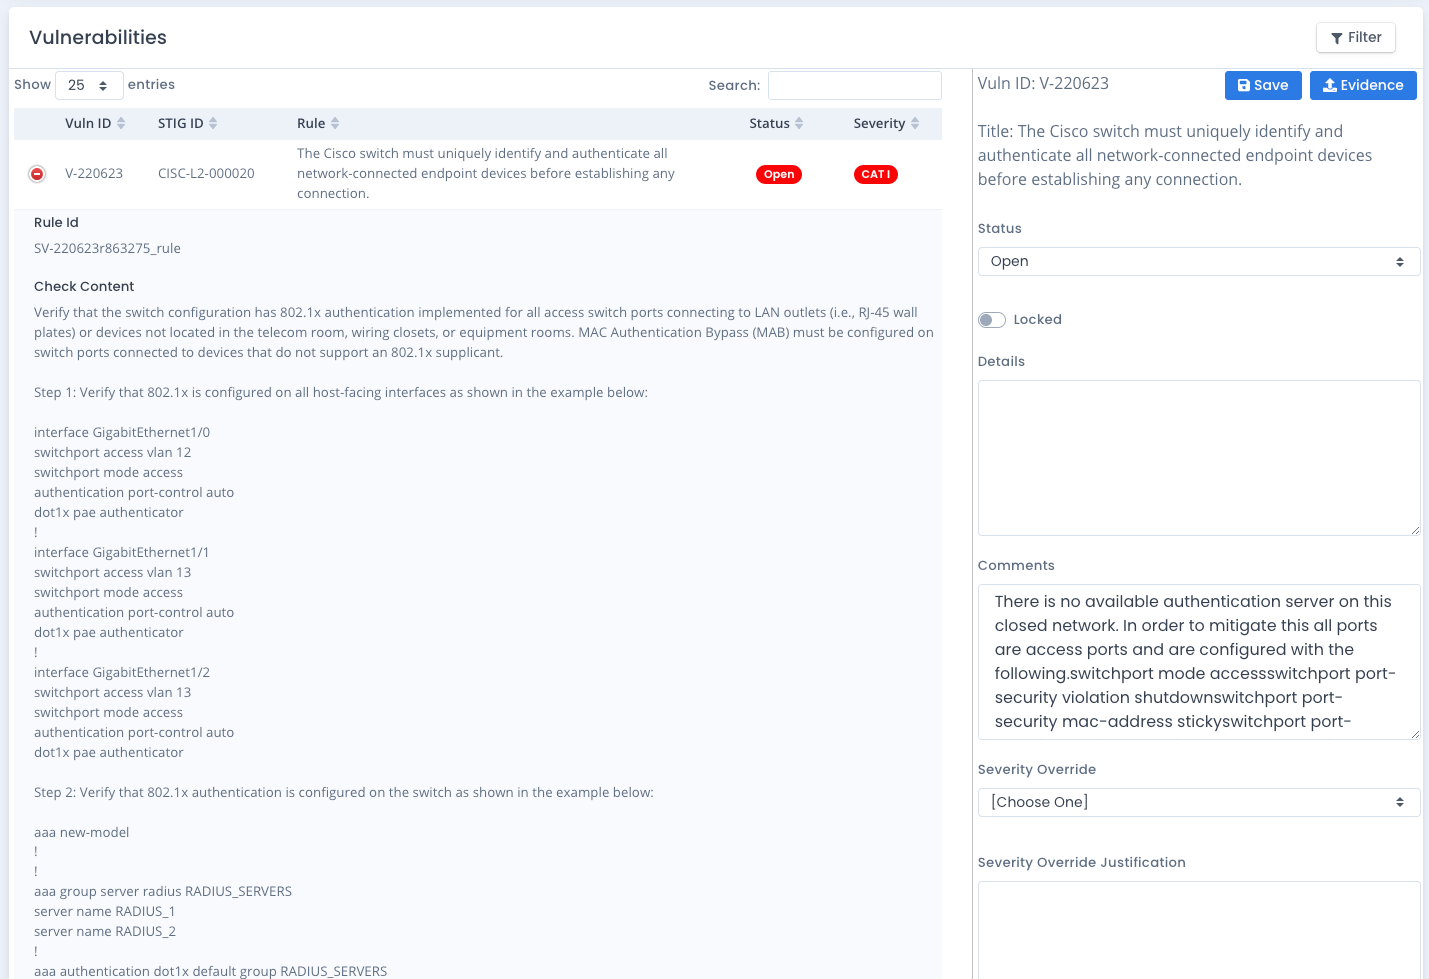
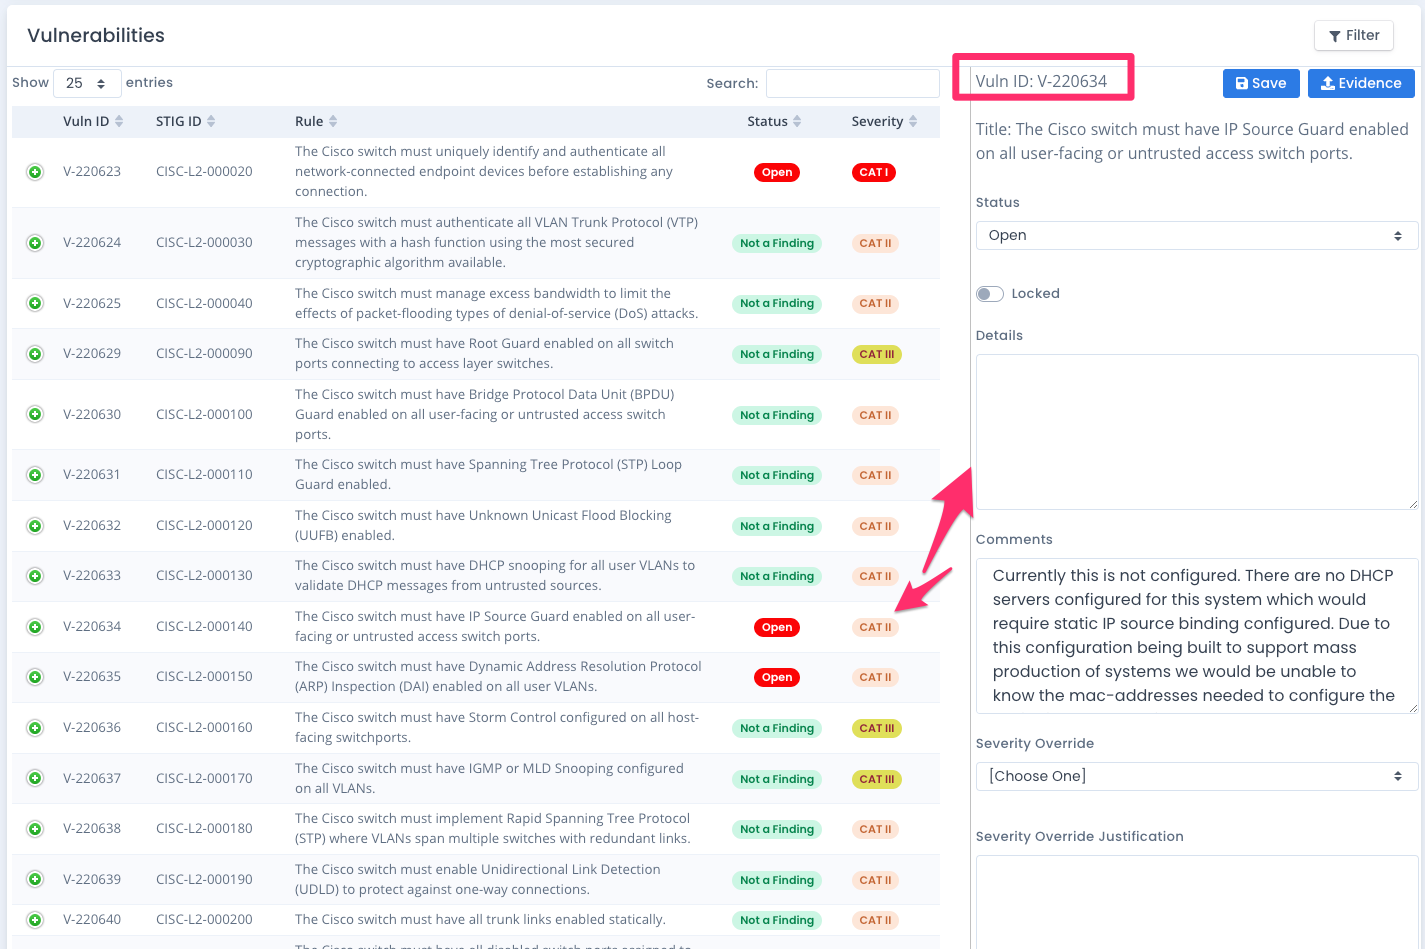
A checklist’s vulnerabilities are primarily the most important section of a checklist. Each checklist’s vulnerabilities are listed on the checklist page in a table format for ease of viewing, sorting and searching with the table structure. It shows the main Ids of the vulnerability, color codes the status, color codes the severity, and shows the rule name.
Click the green + icon to show the additional detail such as the fix text, discussion on the vulnerability, CCI item numbers linking to your framework’s controls and any comments and severity override information.
When vulnerability information is edited through the checklist interface and saved, the “Reason Updated” will update for the history tracking to show the individual fields (Status, Comments, Finding Details, Severity Override) that changed to allow easier tracking and tracing of changes.
Filtering Vulnerability Listing
You can filter the vulnerabilities that show by clicking the Filter button. This just limits the type of vulnerabilities that show on the screen by status, severity or locked settings. Choose the items you want, which by default is to view all of them. You also can choose to show just locked or unlocked vulnerabilities as well. Both are selected by default.
Click the Save Changes button and the list updates with the relevant information. Note that the filter settings is not saved on page reload or with opening other checklists.

Vulnerability Editing and Severity Override
If you have group permissions to edit a checklist you can click the on the row of the vulnerability row and the vulnerability form shows and fills in. If you have edit capabilities, this allows you to enter finding details, comments, update the status, as well as enter a severity override if you use that.
Note there is a System Package Preference to disable severity override. If that is set, you cannot edit the override or justification.
Your organization as well as your assessor for your RMF process and ATO submission may have rules on what is required or desired in these entries. It would be good to ask before you start editing too much within entering the proper data.
From the edit vulnerability screen you also can lock the vulnerability while editing. Note that if you lock it while editing you must unlock it before changing any fields again.
Finally you can add evidence for this individual vulnerability on the checklist by uploading files. If there is evidence for a vulnerability, it will show in the listing with a paperclip icon. And the list of vulnerabilities with evidence appears in the Details are of the checklist screen.
If you use the Severity override the vulnerability listing will show the new severity and a down arrow will appear next to it to show it was updated. Additionally the details that show when you click the green + icon on each row will reveal the original severity as well as the new severity and the justification entered for it.
If you only have reader access, the form will show but the save button and functionality is disabled.
Automated Updating Score and Reports
For any update to a checklist, whether an upload or upgrade or vulnerability edit, the checklist score is updated behind the scenes in OpenRMF® Professional. And the older score will be versioned and saved with the older checklist data. Additionally the total system checklist score across all checklists is updated and a historical record saved of the current one before the update.
All this automation is done for you so you do not need a separate have a document or spreadsheet tracking the number of items.
Along with this, any report data for the checklist vulnerabilities that was parsed is updated in the report database. That report data is NOT versioned. It is the “latest and greatest” for reporting purposes.
And any POAM item linked to this checklist is updated for the status, severity, severity override, comments, details, and other pertinent data. From there the POAM process takes over as far as showing on the screen, exporting to MS Excel (*.XLSX) and reporting.