Using your Live POAM
OpenRMF® Professional allows you to have an active, editable, online Plan of Action and Milestones (POAM) that will track your open checklist (STIG) vulnerabilities, patch vulnerabilities, compliance statements and controls, as well as other technology vulnerabilities live. It allows exporting the plan into a MS Excel spreadsheet for reporting or importing into approved programs of record for agencies and companies. POAMs are not started and generated automatically. The System Owner must click the “Create” button when ready to create a POAM if desired. It is live from there forward.
The process will pull all Open and Not Reviewed checklist vulnerabilities as well as all Critical, High, Medium, and Low patch vulnerabilities and put them into a listing tied to their original data. It also pulls any open container or software open vulnerability (if used), compliance statements, and inherited controls in the same way. Then you can see what original checklist, patch vulnerability or other item caused that POAM item to be created.
Once created, the POAM is tied to any updates of the original data updates. If you wish to tie this to an external POAM system there is a “Linked POAM Id” field to do that as well. See the next two sections on how that data is updated bidirectionally.
Note the POAM contains one line per vulnerability per device / checklist / scan project for traceability and automation purposes. This may make your POAM look very large for system packages that have many devices or checklists with open vulnerabilities. This is for detailed display purposes and traceability for the automation of opening and closing POAM items.
If your POAM entry contains any evidence files attached, a paperclip icon will show in the POAM row listing to notify you there is evidence attached to that POAM record.
If your POAM has a scheduled completion date within 30 days and is still Ongoing, it also shows a calendar icon for a quick visual noting this. The calendar is colored red if the date is past due.

Viewing POAM Listings
You can filter the POAM by selecting the 30 / 60 / 90 day filter. If you want to view all data you can choose the All option. Data is sorted by the Overall Residual Risk, then the Raw Severity, and grouped by patch vulnerabilities and then checklist vulnerabilities within each of those risk and severity levels. The ordering is as follows for the web listing and the MS Excel export:
- Very High Overall Residual Risk
- Critical Patch Vulnerabilities
- Critical Manual POAM items
- High Overall Residual Risk
- High Patch Vulnerabilities
- High Checklist Vulnerabilities
- High Manual POAM items
- Moderate Overall Residual Risk
- Medium Patch Vulnerabilities
- Medium Checklist Vulnerabilities
- Moderate Manual POAM items
- Low Overall Residual Risk
- Low Patch Vulnerabilities
- Low Checklist Vulnerabilities
- Low Manual POAM items
- Very Low Overall Residual Risk
- Very Low Manual POAM items
Filtering the POAM Listing
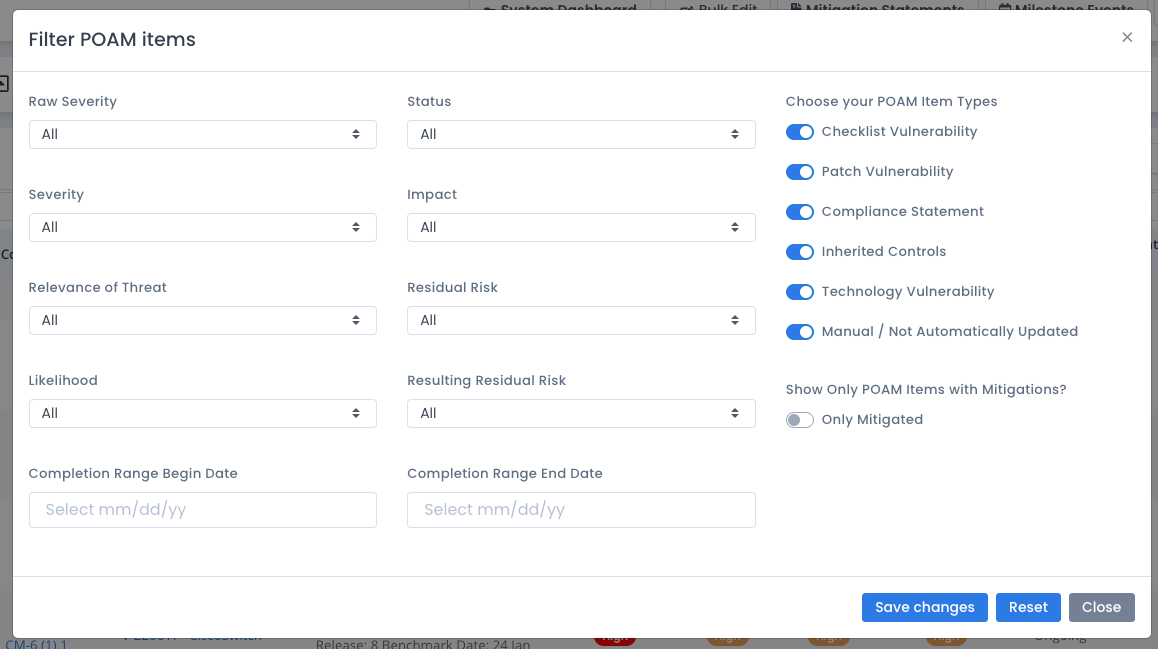
You can click the Filter button and open a filter to view specific POAM entries. Select the severity, status, impact, and other items and click the Save changes button to set the filter and refresh the page.
The “Choose your POAM Item Types” allows you to filter the POAM based on the item automatically linking to a checklist vulnerability, patch vulnerability, or other item listed. The “Manual / Not Automatically Updated” are for those items that are manually added, as well as those items linked to checklists or other items in the POAM listing that have had their linked item deleted. This can be a checklist deleted, a hardware device deleted, or other items removed from your system package.
Creating a New POAM Record Manually
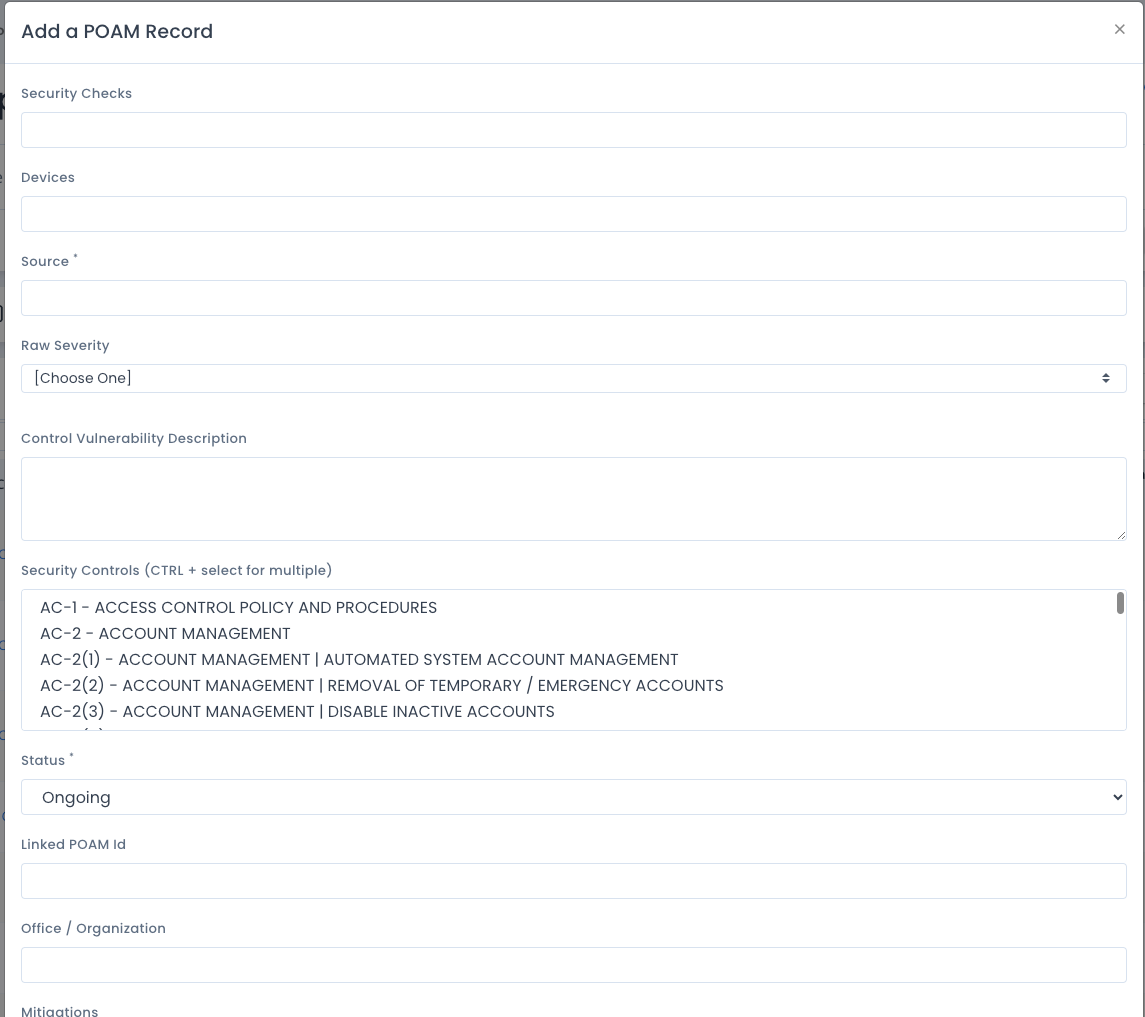
If you have System Owner or POAM Editor permissions, you can add a new POAM record to the POAM listing. Most items for the POAM are automated through checklists and patches. However, you can add non-automated records to the POAM as well for tracking purposes. You will see additional fields for specifying the security checks, device, source, and security controls for the new POAM record as well as the other fields you normally see for automated items.
You must enter a Source and specify a Status for any manually created POAM items at a minimum.
Updating POAM Records Directly
If you have System Owner or POAM Editor permissions, you can click the ... menu next to each POAM item and a popup editor appears. You can add information such as comments, severity, likelihood, comments, mitigations, linked milestone record, and the like. The dropdowns when saved with a value will color code the data in the table and the details view (click the green + icon).
Setting the Resulting Risk also will change the sort order as shown above. This will allow you to specify those items that are the riskiest at the top so you can see them, act on them, and work to minimize the issues in proper priority order.
There is also a slider for “Accept Risk” that you can choose if the POAM item is currently Ongoing. The item will be marked as accepted and the date of acceptance will be saved. You can slide this to the off position to return it back to Ongoing. The status and the date will be exported in the MS Excel file as well.
There is some automation built into the POAM entries. As you select Severity and Relevance of Threat, based on those values of Very High to Very Low the Likelihood is automatically set based on NIST rules on risk. This value can be set differently. But it will default when not filled in to a calculation based on Severity and Threat. This is only done when the Likelihood is not already set.
In the same way, as you select Likelihood and Impact, the Residual Risk is automatically set based on those values of Very High to Very Low from those fields. Just as stated above, this value can be set differently. But it will default when not filled in to a calculation based on Likelihood and Impact. This is only done when the Residual Risk is not already set.
Updating POAM Records Automatically
There are several automated ways the POAM items are updated. The data that is updated includes comments and status for existing items.
For new items from newer/updated checklists or new patch vulnerabilities from scans, all data is added the same way as if you just clicked the “create” button for the POAM. A patch vulnerability from a new server or a new item of an existing server will create a POAM record. And any open or “not reviewed” STIG checklist vulnerability will also create a new POAM record.
Any patch vulnerability scan upload, checklist upload, checklist upgrade, technology vulnerability upload or import, or vulnerability editing through OpenRMF® Professional may also possibly affect POAM items for status, completion, and comments. This data is automatically updated from checklists and patches to the POAM to keep data in sync and consistent. A new patch scan or technology vulnerability scan uploaded with vulnerabilities no longer present will render that corresponding POAM item Completed with the date.
Any checklist vulnerability whose status changes to “not a finding” or “not applicable” also will be marked Completed with the date. If the STIG checklist vulnerability is “not reviewed” or marked “open” it is added or updated to the POAM listing as well.
In the same way, any compliance statement added, updated or deleted that has an Open or Not Reviewed status is automatically added to a POAM when the POAM is created and used. And any inherited control that is Open or Not Reviewed also will create a POAM entry automatically.
This in essence creates a live POAM that will include the most up-to-date information matching your checklists, SCAP scans, and patch scans within your system package. A detailed reason why the POAM record was updated is included in the “reason for update” field to ensure you know why the update happened.
If you edit a comment on the POAM side, that comment is also added to the checklist vulnerability corresponding to the POAM entry as well automatically in the reverse direction as above. This keeps data in sync and consistent.
Regardless of the way you edit the POAM items, automatically or manually, there is bidirectional communication to keep all those files in sync automatically.
When you delete any hardware device, other technology project, checklist, compliance statement or inheritance control the POAM item is updated as “Completed” with the date of the deletion. The POAM history is saved, the reason tracked, and the linkage to the deleted item is removed so there are no broken links or automation errors from the deleted item.
Uploading an eMASS Formatted POAM for updating data
You also can upload an eMASS formatted .xlsx file to update your system package if you have edited the POAM data outside of OpenRMF Professional. This can be in the .xlsx file itself or via eMASS and then exporting the file from eMASS. To do so click the Upload button. You must be a POAM Editor or the System Owner of the package to have this ability.
The fields below are updated based on the combination of the security check and the device name (hostname). Or if there is a Linked POAM Id matched to the eMASS .xlsx file for those items manually added as well.
- Status
- Office / Organization
- Resources Required
- Scheduled Completion Date
- Comments
- Severity
- Likelihood
- Impact
- Impact Description
- Relevance of Threat
- Threat Description
- Residual Risk
- Residual Risk with Mitigations
- Recommendations
- Predisposing Conditions
Exporting your POAM
You can click the Download button to export the data on the screen you listed to MS Excel. The severity, likelihood, impact, risk, etc. types of values of Very High to Very Low are color coded as well to highlight their information. If the status is Completed or Risk Accepted, the date this was determined is also shown.
Your options on the download selection window are to export a listing that is exactly like the POAM listing on the screen in an eMASS type of format for US government usage, based on the different instances of eMASS. You also can export a MCCAST (US Marine Corps) formatted POAM. Or you can export a one-for-one listing of each POAM record into a listing showing all fields.
For the eMASS POAM export, the process groups on all columns exported so if there is a difference in severity, likelihood, mitigations, etc. you may still get additional lines per security check. You must verify your data, use editing or bulk edit POAM to save updates, and then re-run the export to have an exact 1-line-per-security-check if you see duplications.
The US Navy export lists devices as well as 3 additional columns that the US Air Force and US Army do not.
Rules for Risk, Residual Risk, and Your Organization
Most organizations have a way to classify the severity, allow mitigations, and mix the likelihood and impact with recommendations to get to the final overall residual risk. This will result in your risk classifications looking like the green, yellow, orange, and red risk chart highlighting Likelihood and Impact/Consequence. The POAM gives you the data. The rules on how you set and use the data is up to you and your organization.
NIST 800-37 Rev 2 https://csrc.nist.gov/publications/detail/sp/800-37/rev-2/final and https://nvlpubs.nist.gov/nistpubs/SpecialPublications/NIST.SP.800-37r2.pdf have information spelled out on how to evaluate and assess the risk items you specify in your POAM. Use that information along with your organizational rules to make sure you specify your risk correctly.