Atlassian Jira Integration
The Jira integration in OpenRMF® Professional allows you to create issues quickly and easily off various pages within the application that link directly back to your OpenRMF® Professional installation. Once setup, creating the issue is as easy as clicking the Create Issue menu option, filling out the details, and clicking the Create button.
Generate a Login Token (Do not use Password)
To use the Atlassian Jira integration you must have a username and token to use. OpenRMF® Professional does not use the Jira username and password for API calls and integration. It uses a user token generated for a particular user designated by you for integration.
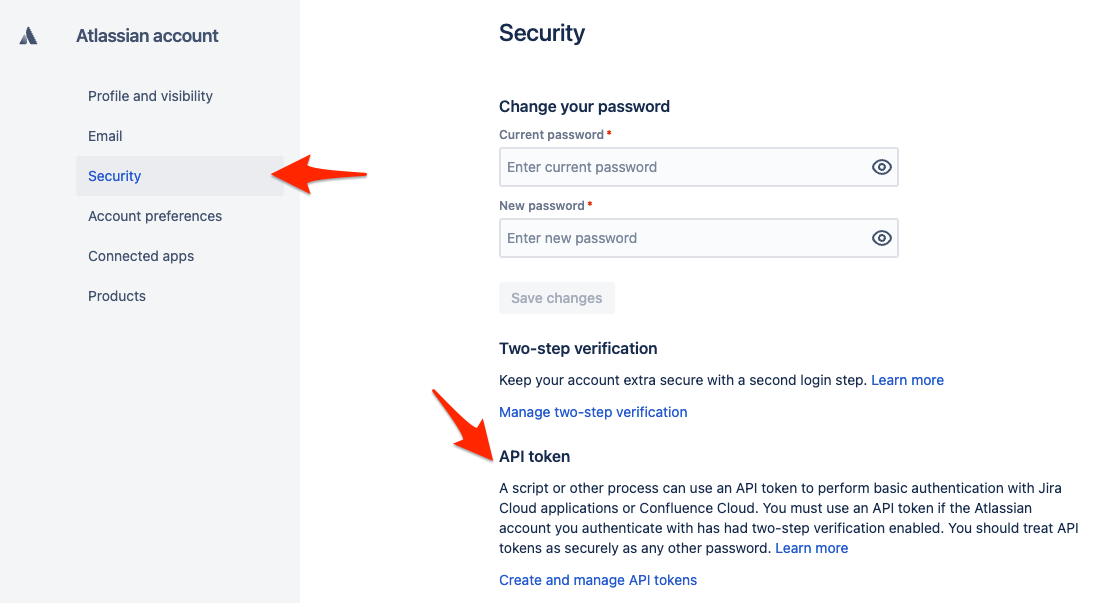
To generate the token, click the Profile icon and select the Profile menu link. On the next page, click the Security menu on the left. Finally, click the Create and manage AP tokens link on the page that loads. From this page, click the Create API Token button and specify a name for the token to use. Copy this to use later for integration purposes.
See the image below for direction on how to get to the page to generate a token.
Enabling the Integration
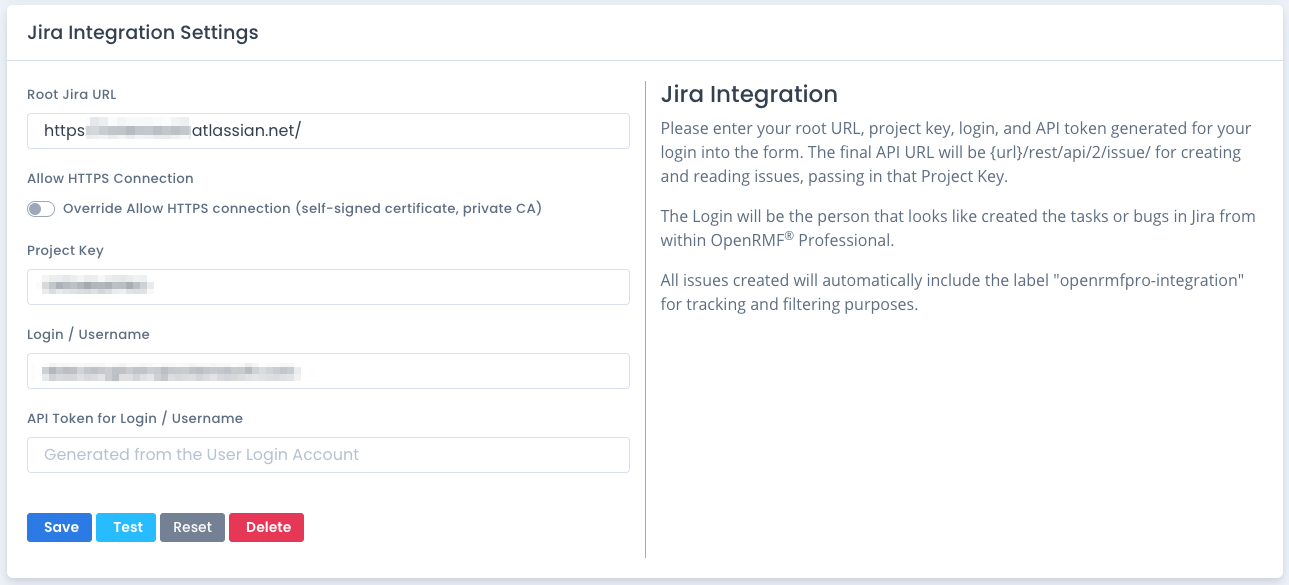
To enable the integration, go to the Integrations and Plugins page and click the Jira option. The form shown below appears asking for the Root Jira URL, the Project Key for your Jira project, as well as a Login and API token (generated from your profile) you can use to log in and create issues. Note that the user/token used will appear as the person who created the Issues. For Jira there is always a tag of “openrmfpro-integration” included with each issue created.
You can test the Jira integration with the Test button before saving it. Please make sure the Test is successful before saving your integration information.
You can always return back and delete the integration as well. If you return to edit the integration you MUST include the password/token again as we do not transfer that back and forth to the Integration page.
If your Jira is a self-signed certificate HTTPS site or you generated your own corporate/organizational valid HTTPS certificate internally, you can click the “Allow HTTPS Connection” option so it accepts the HTTPS connection. You may need to do this if on a private network, a disconnected network, or using a self-signed certificate or a custom certificate authority.
Now that the integration is setup, return back to your system package dashboard, upload checklist, patch data, compliance or other sections within your system package. Where you see the far right ... menu button where you selected to create the integration itself, click it to get the Create Issue menu option as shown below.
Creating Issues
Clicking the Create Issue button opens the Create Issue slide out to fill in the title, type, priority, description and add any extra tags to the issue. The Project Key for the Jira project is also listed in the slide out form to make sure it is integrated with the proper project. Fill in the fields (all are required but Tags) and click the Create button.
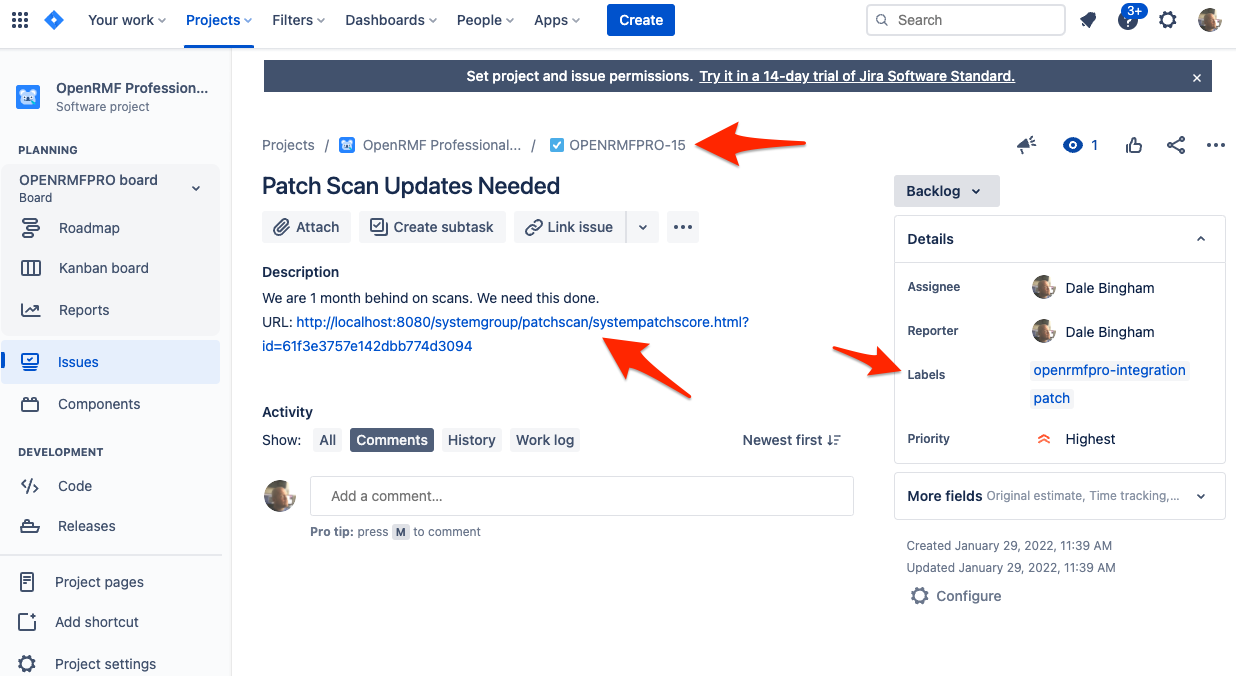
The OpenRMF® Professional current page URL is added to the end of the description and the issue will be created. You will see the normal green “issue created” type of message if all went well.

The result is a new issue with the proper title, description, tags and link back to the page referenced in the issue.