OpenRMF® Professional Screens, Menus, Buttons
OpenRMF® Professional is 100% web-based and works great on all modern browsers. It includes some code to handle older browsers as well just in case. The main structures used throughout the application are listed below to familiarize yourself.
Menu Area
The menu is available once you log in and click on the concent/splash page button. If you are an Administrator you see the Administration listing otherwise you do not. There are other menu options such as Add System Package that are only shown if you are an application Administrator or System Package Administrator as well. The menus are self explanatory and other areas of the help go into detail for system packages, Reports, Checklists, and Templates.
On the far right of the menu are 3 other options. The cog icon is for changing user settings, such as light mode or dark mode. We will be adding more settings as time goes on here as well. The next icon is for user notifications and shows the most recent 5 notifications for the user. These are based on system and application access as well. And there is a View All link to go to the Notifications page.
Finally is the profile menu. Click on the icon showing your login name initials to get a link for updating your profile, listing your user permissions and logging out. Your Profile also has options to update your password, setup two-factor authentication, and seeing what sessions you have currently open for your login.

Top Page Area
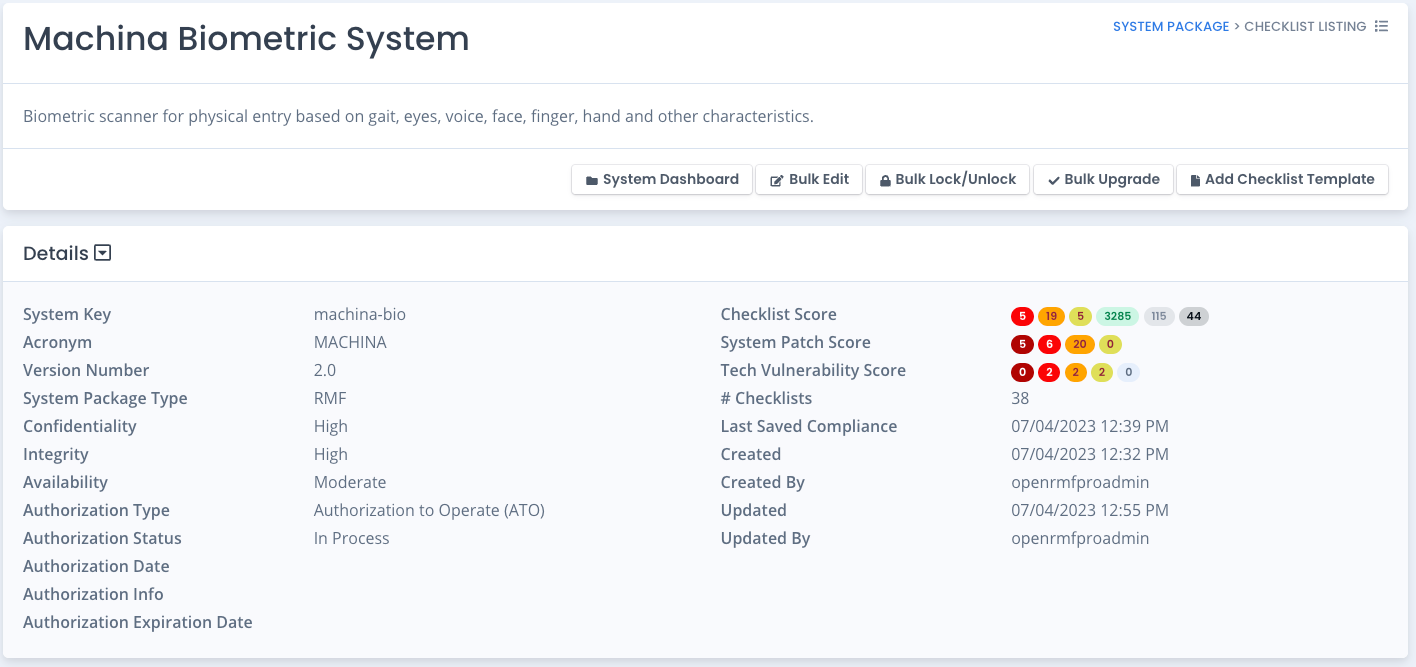
The top area of most pages for system packages and checklists show the high level data on the system package or checklist being viewed. That includes the title, description, any scores, as well as the main buttons for actions on the data. This information is minimized by default to save room on your screen. You can click the arrow button next to the Details label to expand and collapse the information as required.
Breadcrumbs
To help show what page you are on and how you got there, there are breadcrumbs in the top right of the pages throughout OpenRMF® Professional. Each part of the beginning breadcrumb are links to get you back to where you were previously. You will see these mainly on the System Package area and the Template area in particular.
Table Data Listing
Most listing of data is done in a table format with a dropdown to set entries / listings per page. The default is 25 for most pages. You also have a checkbox when bulk actions are available on the listing. You will see a bulk actions button appear in the top right just above the table when checkboxes are checked. There may also be an export button to export data to MS Excel (*.XLSX) as well as a Filter button to filter data showing in the table.
You can type into the Search box at the top of the table to automatically filter the results. This works on any table listing across the application. You can click the “X” in the box to clear the data or just delete it with the Delete key on your keyboard. The bottom of the table shows pages based on the number of entries per page and the total records returned. You also see the “showing X of Y entries” giving you the total records returned.
On some pages listing data, the actual elements in the table allow you to click them and automatically filter the table. You will see the item you clicked automatically appear in the Search box and filter the table. If you mouse over the items you will see a “Filter by this” type of popup help for you to know.
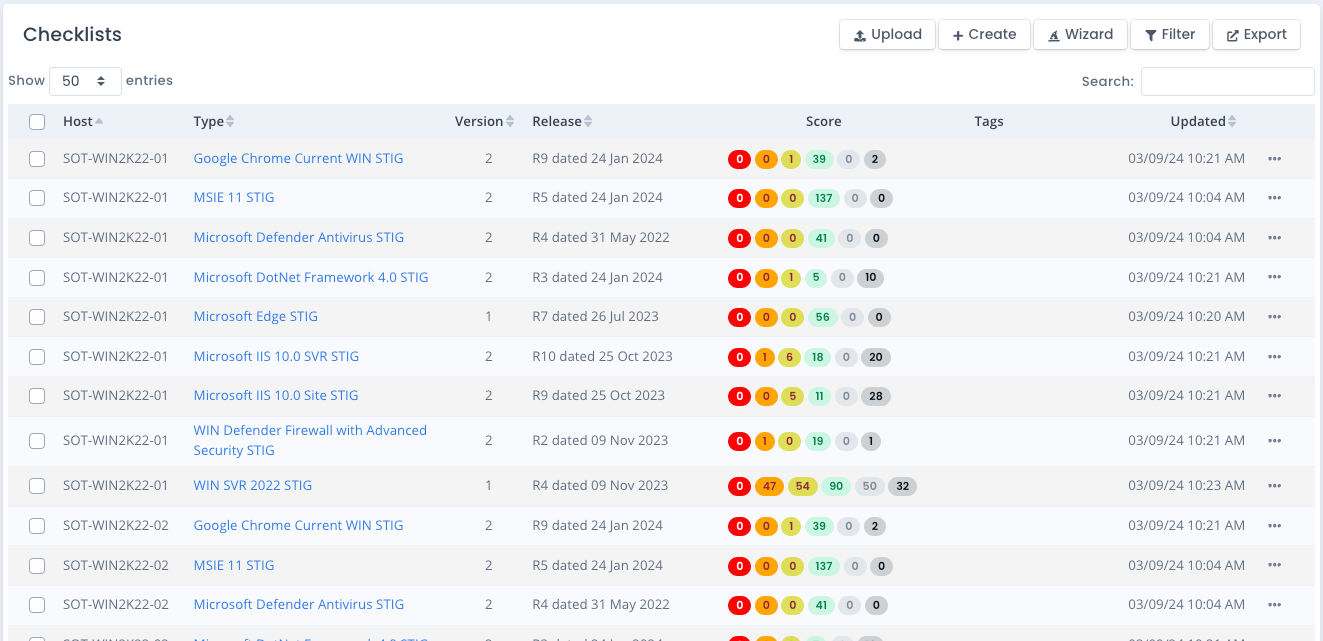
There are sometimes a little green plus image or a red minus image on each table row. Click on these to get more detailed information for that row or to then hide that same detail. You can sort most table columns by clicking on the column headers if the up and down arrow icons are shown above it.
Popup Menus
Any buttons or listing in a table with the “…” is a popup menu. You may see menus to edit, delete, download or open items from table listings.
Chart Items
For any charts in the system you can click on the legend text or icon to turn that data on/off inside the chart. The legend items are toggles to turn the data on/off from showing so you can pinpoint the data you wish to see in the chart. For most charts, you also have a “download chart” link or icon to download the chart as a JPG image to your local computer.