Using System Package Compliance Overlays
When generating compliance you also may need to use overlays. These are groups of controls that are added onto your listing based on the framework used and controls added to the overlay. In OpenRMF® Professional you have two types of overlays - System Package overlays and then application-wide available overlays that Adminisrators can add for any system package to use.
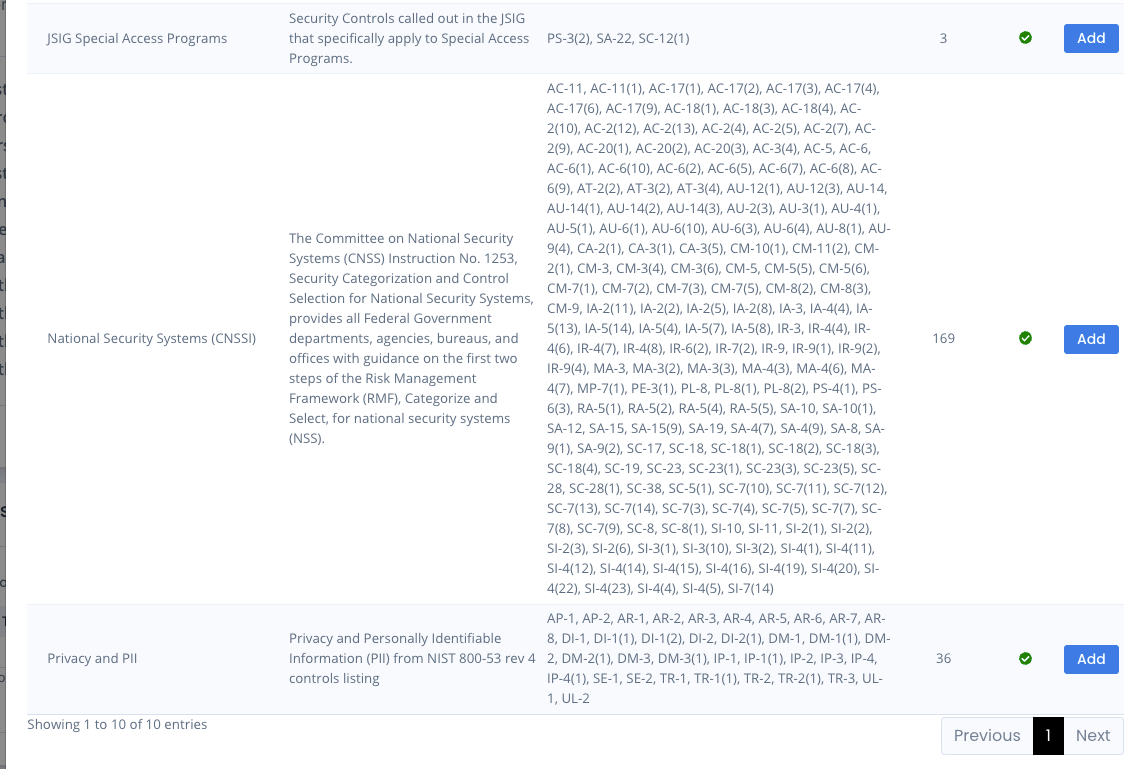
By default, OpenRMF® Professional comes with 6 application-wide overlays you can use:
- Privacy/PII
- National Security System (CNSSI)
- Classified Systems
- Federal PKI
- Electronic Physical Access Control Systems (ePACS)
- JSIG Special Access Programs
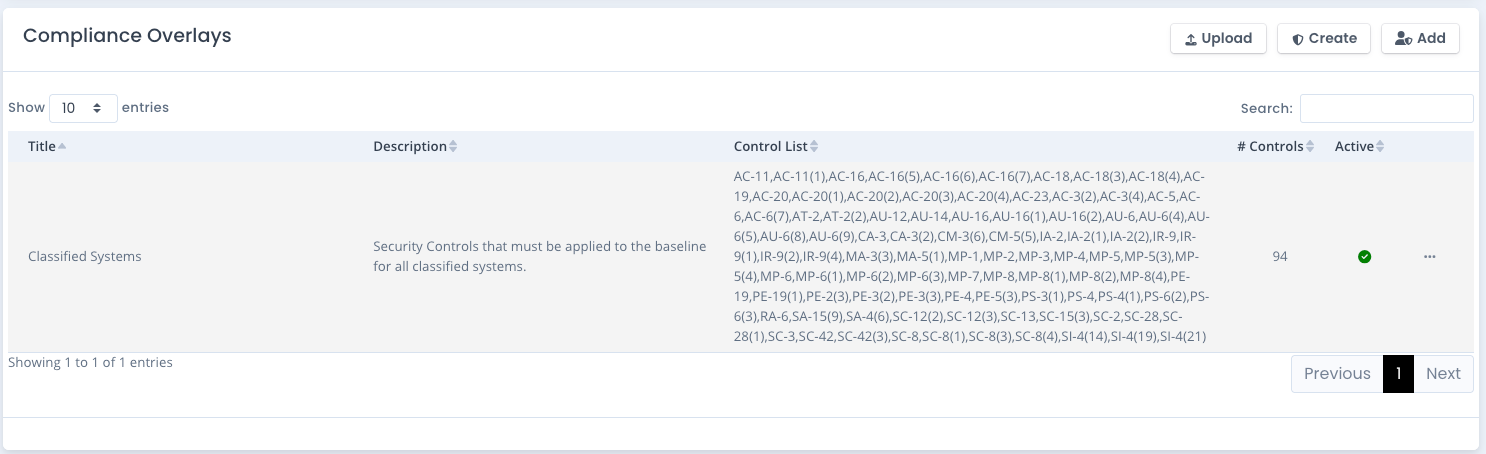
Listing Overlays
When you go to the Overlay screen it displays any overlays and shows the title, description, list of controls and if it is active. On the far right of each listing is the ... menu to allow Editing, Deleting, or downloading of the full overlay to a JSON file or just the list of controls to JSON, XLSX, CSV, or XML to use elsewhere for Tailoring if you desire.

Adding an Available Overlay
To add an available overlay click the Add button if you are a System Owner of the system package you are viewing. A table appears showing a listing of available overlays already made and shared for people using this installation of OpenRMF® Professional. Find the one you wish to use and click the Add button.
The overlay is now copied into your system package. Now that it is in your system package you can edit it and make it inactive if not in use.
Creating an Overlay
To create your own overlay from scratch click the Create button. This will create an overlay for you to use in your system package. It will list all available controls from your current system package framework selection.
If adding one at the application-wide Administration level you have to choose a Framework from the available list before adding any controls.
Add a title, description and then add 1 or more controls listed on the right column to save your overlay. When active it will automatically be included in compliance generation as well as SSP control to vulnerability information.
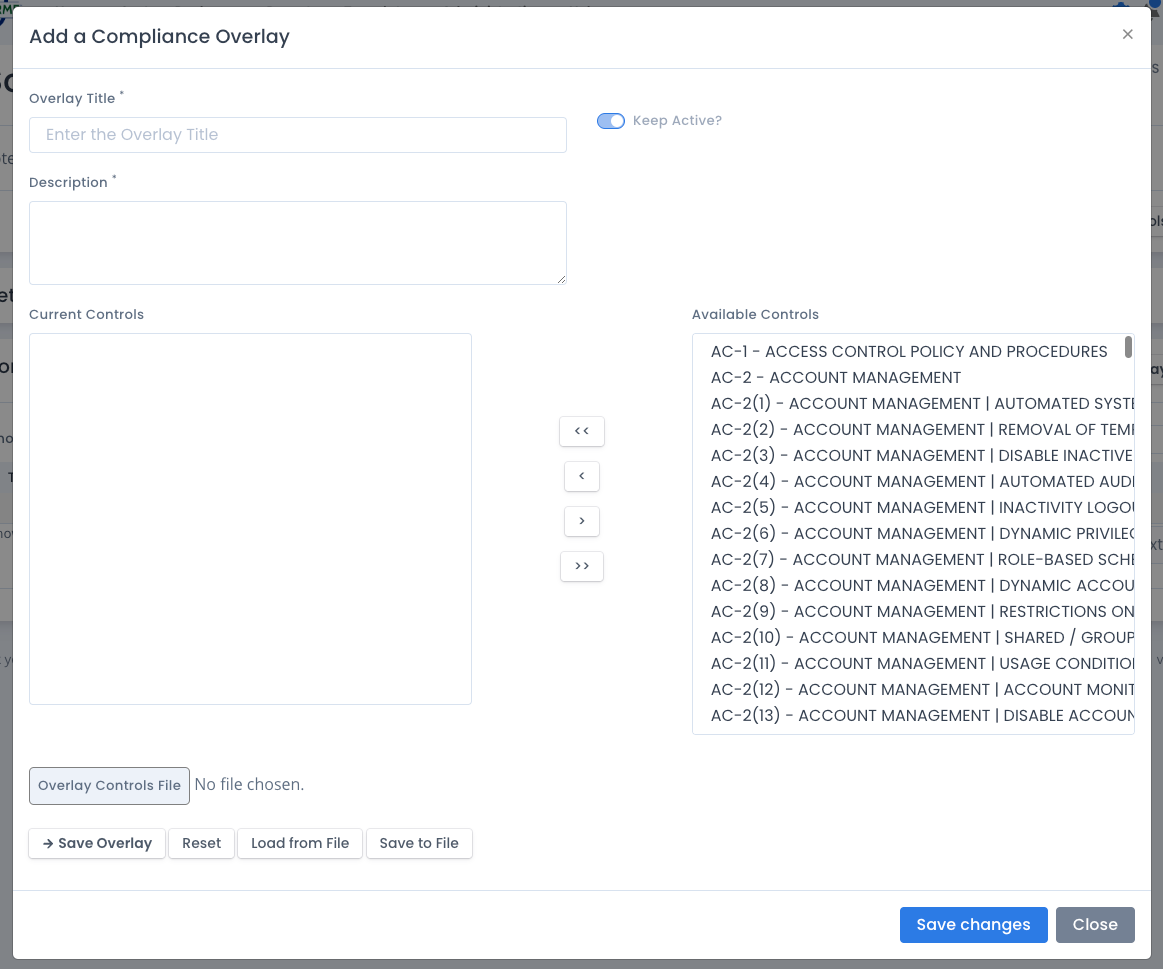
Creating an Overlay by Uploading a JSON file
You also can upload a saved .json file downloaded using the “Download Overlay” menu option mentioned above. Click the Overlay File button on the Add a Compliance Overlay screen. Select the file from your file listing window and select Open to upload the file. A prompt will warn you all edited data will be replaced. Click OK to load that overlay and listing and edit and/or save it to use in your system package.
The JSON structure is shown below:
{
    "frameworkWithVersion":"RMF Revision 5",
    "overlayTitle":"Program Overlay",
    "overlayDescription":"The required Program Overlay",
    "overlayControls":[
        "SR-10","SR-11","SR-11(1)","SR-11(2)","SR-11(3)","SR-12","SR-8","SR-9","SR-9(1)"
    ]
}
Edit an Overlay
To edit an overlay click the ... menu button to the right of the listing and select Edit. This loads the Edit window with the current settings for the overlay. Update the title, description and 1 or more controls to save your overlay. Remember, when active it will automatically be included in the next compliance generation as well as SSP control to vulnerability information. Click the Save button to save the updates.
Delete an Overlay
To delete an overlay click the ... menu button to the right of the listing and select Delete. This will verify the deletion and if you click OK will delete the overlay for that system package. When removed, any controls not used elsewhere in your system package are removed in the next compliance generation as well as SSP control to vulnerability information.